Apr 142013
 

traditional-lamb-stir-fryWith soccer season in full swing our family schedule is busier than ever.

And with everyone going in different directions, cooking dinner has become a shared responsibility. Needless to say, dishes that are both easy and filling are big hits with everyone in our house, especially the chef!

(add or subtract vegetables to your liking and/or what you have on hand.)

Enjoy!

Traditional Lamb Stir-Fry
 

Ingredients
  • 1 tablespoon sesame seeds, toasted
  • ¼ cup soy sauce
  • 2 tablespoons red wine or water
  • ½ teaspoon garlic powder
  • ¼ teaspoon ground ginger
  • 1 tablespoon cornstarch
  • ¼ teaspoon pepper
  • ⅛ teaspoon cayenne
  • 2 teaspoons peanut oil
  • 1 pound American Lamb leg, cut into strips
  • 3 medium carrots, finely diced
  • 2 stalks celery, sliced diagonally
  • 1 cup sliced mushrooms
  • 1 cup snow peas, trimmed
  • 3 cups shredded cabbage
  • 1 can (8 ounces) sliced water chestnuts, drained
  • 6 green onions, sliced diagonally
  • 1 can (2 ounces) diced pimento, drained
  • Hot cooked rice

Instructions
  1. Toast seeds in wok; set aside.
  2. In small bowl, combine soy sauce, wine, garlic, ginger, cornstarch, pepper and cayenne. Set aside.
  3. Heat wok or large skillet; heat oil. When hot, add lamb strips; stir-fry for 2 minutes. Add carrots, celery and mushrooms; stir-fry with lamb for an additional 2 minutes. Remove lamb and vegetables from wok; keep warm. Add soy sauce mixture to wok; stir until mixture begins to thicken. Immediately add lamb and cooked vegetables; add pea pods, cabbage, chestnuts, onions and pimento. Stir-fry for 2 minutes.
  4. Sprinkle with toasted sesame seeds and serve with hot cooked rice.
 

 Posted by at 1:02 am
Mar 242013
 

Good Start SmoothieOkay, enough already! I have been fighting a cold all week and today, finally, I decided to put my foot down! No more.

I have seen my share of doctors the past couple of months and greatly appreciate their services. I wouldn’t be walking limp free without a very wonderful doctor. But I am a bit tired of the eye rolls I get whenever I discuss nutrition or more natural alternatives instead of prescription medications.

My rheumatologist won’t even consider that my RA could be linked to food or at least minimized by eating/omitting certain foods. A physician assistant recently totally ignored my excited report that chamomile tea bags helped calm a rash I had on the top of my foot. One that appears only on my foot that was operated on… AND one that three doctors have given me three different diagnosis for. It’s crazy that the daily news is full of all the foods we should and shouldn’t eat, yet repeatedly I run into medical professionals who won’t even listen to the effects of food on one’s energy level, mood, and overall feeling of well-being from the one person who spends 24/7 in my body… ME.

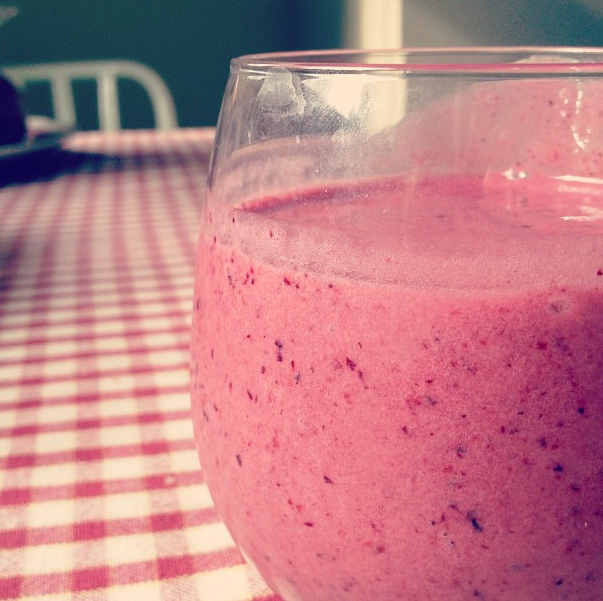
So to that end, I have decided to bombard my cold with nutrition! And what better way to start than with a healthy smoothie.

Good Start Smoothie

Strawberries: Contain Folate and Potassium as well as a very good source of Dietary Fiber, Vitamin C and Manganese.

Blueberries: Another good source of Dietary Fiber and Manganese and packed with Vitamin C. Blueberries are known for their polyphenols – which have both antioxidant and anti-inflammatory properties.

Elderberries: Contain an astounding 60% of Vitamin C, 12% of Vitamin A, 11% of Vitamin B6, as well as Thiamin and Riboflavin. They have powerful antiviral and anti-inflammatory properties thought to sooth coughs, sore throats, bronchial infections and to make sinus conditions looser.

Yogurt: Contains Calcium and Vitamin D along with good bacteria for the digestive tract. (Could easily be omitted. I add yogurt for a smoother texture and to be sure I am getting a dose of my daily calcium.)

Orange Juice: Contains Thiamin, Folate and Potassium and is a very good source of Vitamin C.

Banana: A good source of Dietary Fiber, Vitamin C, Potassium and Manganese, and very high in Vitamin B6.

Good Start Smoothie
 

Ingredients
  • ½ banana
  • 2 handfuls of frozen strawberries
  • 1 handful of frozen blueberries
  • 3 tablespoons of organic yogurt
  • ¼ cup elderberry syrup
  • ½ cup orange juice

Instructions
  1. Starting with banana and add all ingredients to blender. Blend until completely smooth. Add more orange juice as necessary for desired consistency.

Notes
Serves 2


 Posted by at 11:26 pm
Dec 152012
 

[youtube http://www.youtube.com/watch?v=HGfViIDZ62U?feature=player_detailpage&w=640&h=360]

One of my favorite meals for a cold and dreary day! Serve over mashed potatoes with a fresh salad, rustic bread and a glass of Cabernet and you have a fabulous treat for one or a reason to invite over your family and friends. Either way it is the ultimate in comfort food!

Video used with permission by the American Lamb Board.

 Posted by at 11:20 pm
Oct 292012
 

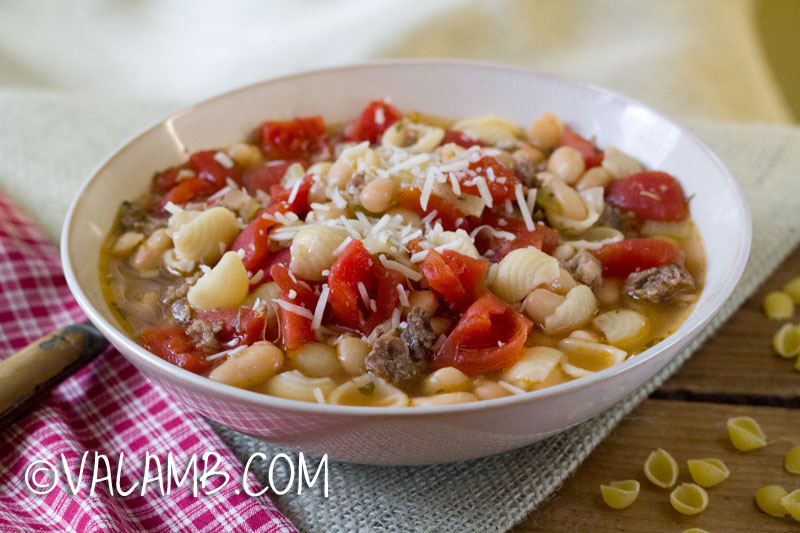
Thanks to hurricane Sandy, we are all hunkered down inside enjoying a very rare lazy afternoon. With the constant sound of chilling rain pelting the house, it seemed like a good day for a hearty bowl of soup.

Not wanting to leave the house, I used staples I found in the freezer and pantry. Feel free to make your own adjustments depending on what you have on hand. For pasta I used mini conchiglie (sea shells), but a ditali or elbow chifferi pasta would work as well.

You can use either pork or lamb sausage. And by all means, substitute in fresh herbs if you have them. This recipe can also be easily made into a hearty vegetarian dish if you prefer.

Pasta Fagioli Soup with Italian Lamb Sausage
Soup

8
 

Ingredients
  • 1 pound bulk Italian sausage
  • 4 stalks celery, chopped
  • 2-3 garlic cloves, diced
  • 2 – 28oz cans diced tomatoes
  • 2 – 15.5oz cans white beans
  • 12 cups chicken stock
  • 2 cups uncooked pasta
  • 1 tablespoon dried parsley
  • 1 tablespoon Italian seasoning
  • ½ teaspoon crushed red pepper flakes
  • Fresh ground pepper, to taste

Instructions
  1. Cook sausage over medium heat until brown. Drain fat. Add diced celery and garlic. Continue cooking until celery is almost translucent.
  2. Add tomatoes, beans, chicken stock, pasta, and seasonings. Stir.
  3. Reduce heat to low and let simmer for 1 hour. Serve with rustic bread, a salad or grilled cheese.


 Posted by at 5:54 pm
Sep 142012
 

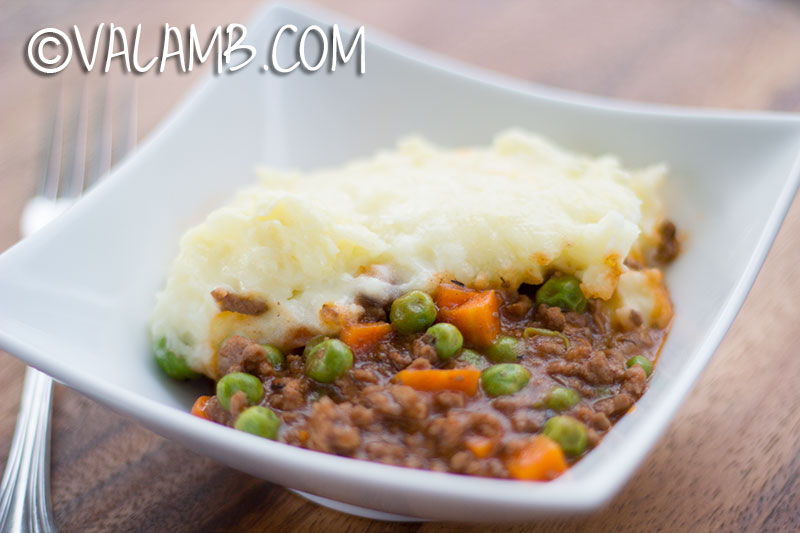
shepherd's pie

I stopped by my father-in-law’s house the other day to check in and see if the lambs were still getting in the yard. Between the lambs and baby goats this year, keeping the yard off limits has been a major struggle. It could be that the manicured lawn and ornamental flowers are beckoning beyond restraint. Or maybe, like most kids, they just can’t resist the urge to jump over the cattle guard or sneak under the fence and since they are already there, have a taste. At any rate, it appears that they are doing less damage to our grandmother’s gardens.

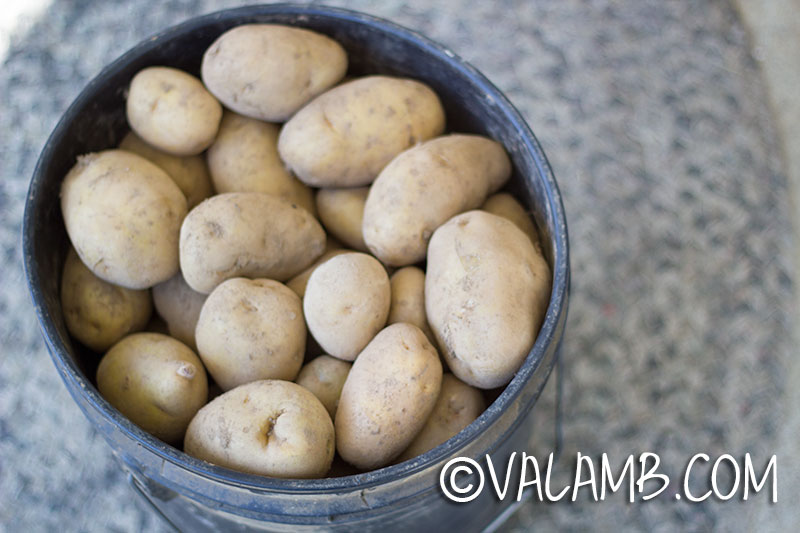
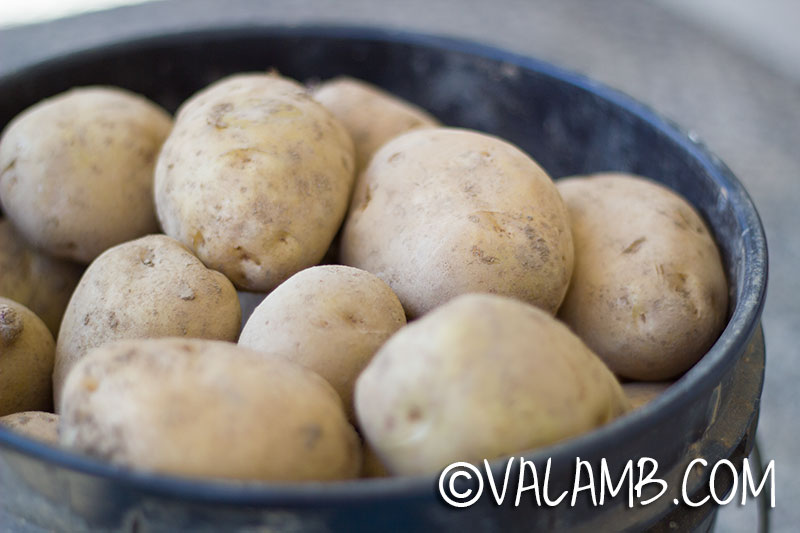
bucket of potatoes

bucket of potatoes

While talking to Farmer Dave, I couldn’t help but notice the two five gallon buckets of potatoes sitting on the kitchen floor still sporting dirt from being freshly dug. Being one who marvels at all the varieties of heirloom vegetables, I am sure my face lit up as I asked him more about them. They were Kennebec potatoes, a variety of white potato developed in Maine, great for boiling and baking. And, in his words, the potato all serious ole time gardeners from around here grow. Turns out they are a hard potato, one that stores exceptionally well, a huge plus for those who grow their own food.

I batted my eyelashes once or twice to signal that I was once again wanting access to one of Dad’s friends, being that he is one of the “ole timers from around here” and even after twenty five years, I am not (uh-hmm, from here). He quickly caved and gave up his source. After a quick phone call, I handed Dad a five dollar bill as instructed and he promised he would deliver them the next day. WOW! Five dollars for a whole five gallon bucket of home grown potatoes! They had to weigh close to 30 or 40 pounds. I would have purchased more, had I not been the proud recipient of the very last bucket.

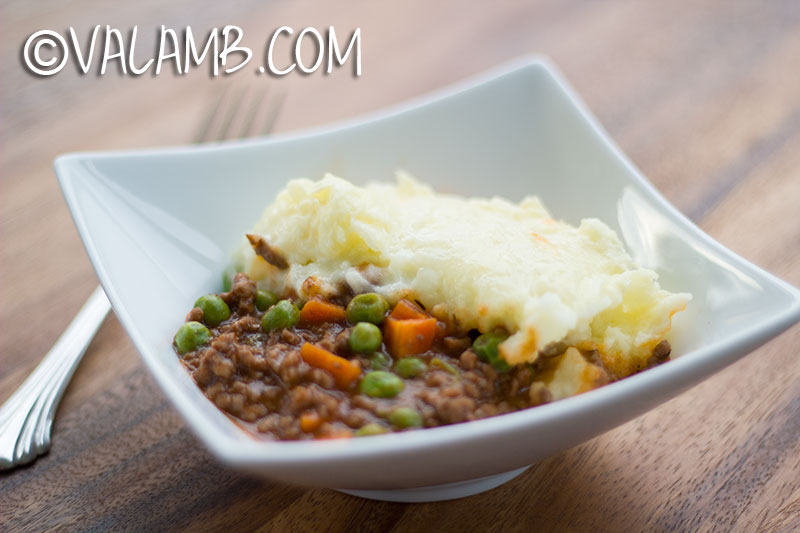
Being raised by a meat-and-potatoes man, then marrying one, I have learned to fix potatoes in numerous ways. I boil them, bake them, and mash them. I make a mean potato cake, herbed home fries and a cheesy au gratin. With football season about to begin, and my never ending hope that fall will be here soon, I thought I would feature my new potatoes in a shepherd’s pie this evening.

A quick distinction: A shepherd is one who watches over a flock of sheep. Thus a Shepherd’s Pie (or sometimes called a Cottage Pie) is always made with ground lamb. I often see recipes online calling for ground beef in a Shepherd’s Pie. Ground beef can be used but then it is traditionally called a Rancher’s Pie. This winter I’ll share my recipe for Rancher’s Pie made with mashed sweet potatoes.

shepherd's pie

True Shepherd’ Pie
4
 

Ingredients
  • 4-5 medium potatoes
  • ¼ cup butter, diced
  • ½-1/3 milk
  • 2 egg yolks, beaten
  • 1 pound ground lamb
  • 1 medium onion
  • 2 cloves garlic
  • 3-4 large carrots, diced small
  • 1 cup frozen peas
  • ½ teaspoon dried thyme
  • 2 teaspoons fresh rosemary, chopped
  • Salt and pepper, to taste
  • 2 tablespoons flour
  • 2 tablespoons tomato paste
  • 1 cup beef stock
  • ½ cup red wine
  • 2 tablespoons Worcestershire sauce
  • Parmesan cheese, grated

Instructions
  1. Peel potatoes and cut into ½” cubes. Add to medium pot, cover with water and bring to a boil. Boil until fork soft approximately 15 minutes.
  2. Preheat oven to 350 degrees F.
  3. Meanwhile, brown ground lamb in deep sided sauté pan over medium heat. Cook until all meat is brown. Drain fat.
  4. Add carrots and continue cooking for 10 minutes. Add onions and garlic, cooking for an additional 5 minutes or until onions begin to turn translucent. Season with salt and pepper.
  5. Add flour, thyme, rosemary, and tomato paste. Stir until well combined.
  6. Stir in beef stock, wine, and Worcestershire sauce. Gently stir in peas. Reduce heat to low and let simmer.
  7. Drain potatoes. Add butter and cover pan until butter melts. Season with salt and pepper.
  8. Add milk to potatoes and using potato masher or hand mixer, mash potatoes until thick and creamy. Add egg yolks and stir until well combined.
  9. Pour lamb mixture into a large greased casserole dish. Using a serving spoon, drop spoonfuls of mashed potatoes over lamb mixture until evenly cover. Sprinkle with cheese.
  10. Place in oven and bake of 30-35 minutes. Cheese and potatoes will begin to brown on top.
  11. Remove and let cool for 10-15 minutes before serving.


 Posted by at 7:58 am
Sep 072012
 

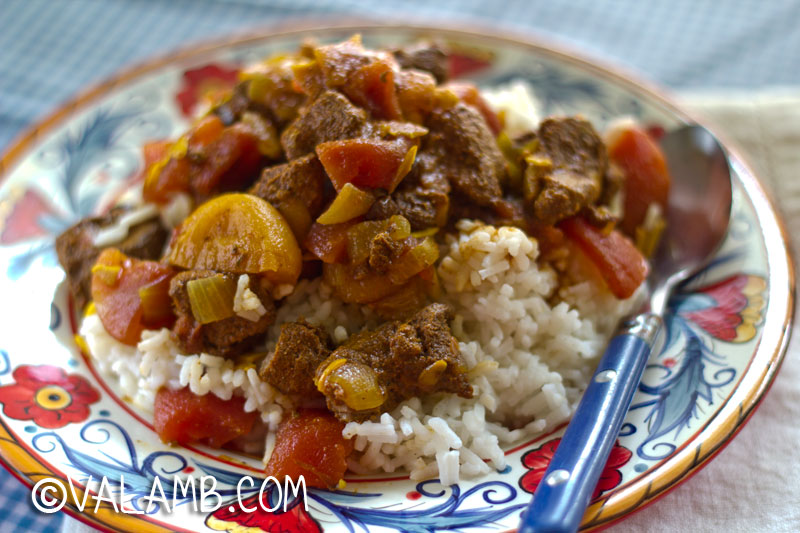
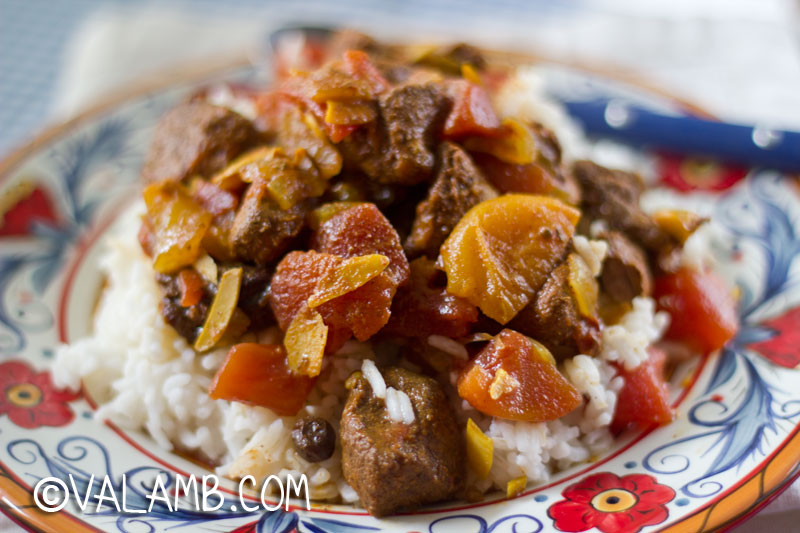
moroccan lamb tagine

This is one of the first Moroccan Lamb Tagines I created years ago. I started with a rather complicated recipe I found in a North African cookbook and simplified it to maximize taste while keeping ingredients easy to find, most of which I keep on hand. 

 moroccan lamb tagine

Moroccan Tagine with Apricots and Honey
 

Ingredients
  • 2-3 pounds lamb shoulder chops
  • 1 teaspoon ground turmeric
  • 1 teaspoon ground ginger
  • 1 teaspoon ground cinnamon
  • ½ teaspoon fresh cracked pepper
  • 1 teaspoon salt
  • 2 tablespoons olive oil
  • 2 large onions, halved and sliced
  • 3 garlic cloves, minced
  • 1 cup chicken stock
  • 1 – 14.5 oz can diced tomatoes
  • 8 threads saffron, crushed
  • 2 tablespoons honey
  • 12 fresh cilantro, chopped
  • 1 cup dried apricots
  • ½ cup golden raisins

Instructions
  1. Preheat oven to 325 degrees.
  2. Cut lamb into one inch boneless cubes. Season with turmeric, ginger, cinnamon, pepper and salt.
  3. Heat 1 tablespoon of olive oil in heavy bottom Dutch oven over medium high heat. Add lamb in small batches to allow for plenty of room. Using tongs turn meat and brown on all sides. Remove lamb and set aside. Repeat until all lamb is browned. Set aside.
  4. Add sliced onion and garlic to Dutch oven. Cook until onions are translucent, scraping bottom of pan to release all the browned bits. Add cooked lamb, chicken stock, diced tomatoes, saffron, honey, cilantro, apricots, and raisins to pan.
  5. Remove from stove, cover and place in a 325 degree preheated oven and cook for 1½ to 2 hours or until meat is fork tender.
  6. Serve over jasmine rice or couscous.

 Posted by at 8:30 am
Sep 042012
 

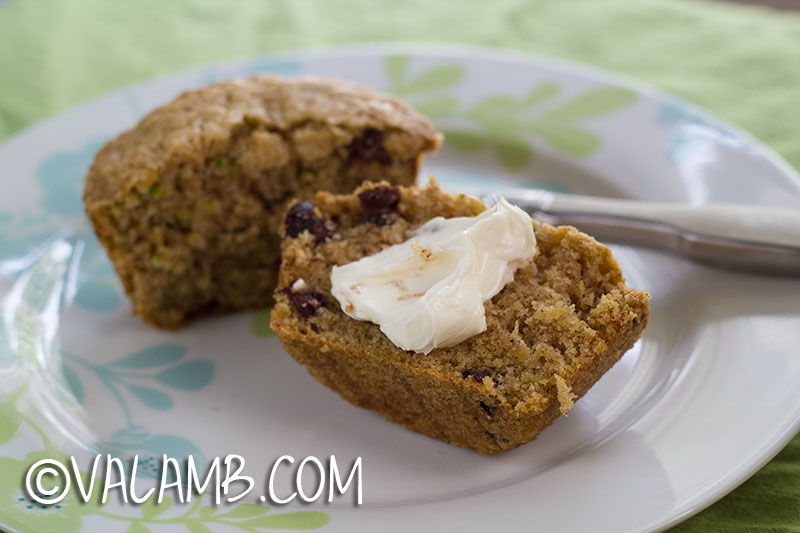
zuchinni muffins

I am not much for chaos. I know, four children right! Add to that not being the ideal morning person and well, sometimes there needs to be a backup plan from the very get-go.

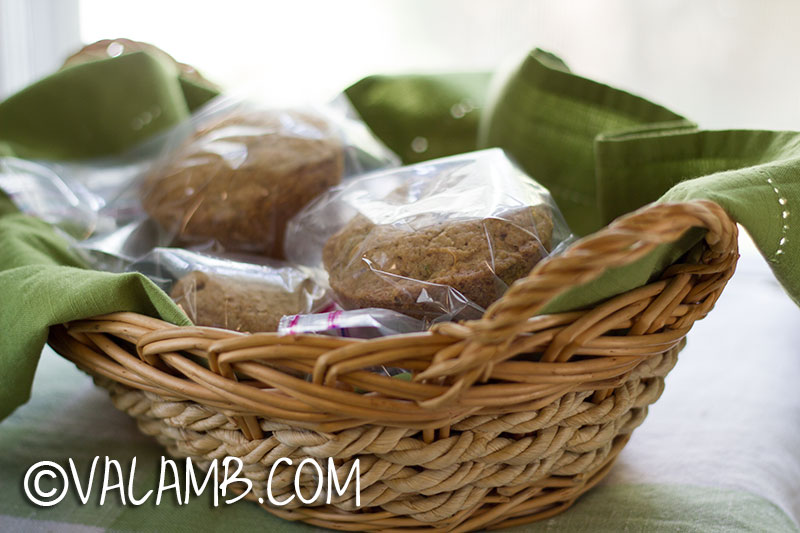
When I know mornings are certain to be hectic, such as the first week of school, I like to bake a batch or two of muffins Sunday afternoon. Because these are sure to be breakfast on the go, I like the large double-size muffins that can be individually wrapped in sandwich bags. That way I can keep a basket full right on the kitchen table.

Since zucchini is still in season here, I decided on Zucchini Chocolate Chip Muffins, a favorite of the kids. As fall approaches I’ll make Banana Nut, Apple Cinnamon, and Pumpkin Spice Muffins too.

zuchinni muffins

Zucchini Chocolate Chip Muffins
 

Ingredients
  • 1½ cup flour
  • 1 teaspoon ground cinnamon
  • ½ teaspoon ground nutmeg
  • ½ teaspoon baking soda
  • ½ teaspoon salt
  • ¼ teaspoon baking powder
  • 1 cup sugar
  • 1 cup finely shredded unpeeled zucchini
  • 1 teaspoon vanilla
  • 1 egg
  • ½ cup cooking oil
  • ½ cup chocolate chips

Instructions
  1. Preheat oven to 350 degrees F.
  2. In a medium size bowl stir together flour, cinnamon, nutmeg, baking soda, salt, and baking powder. Set aside.
  3. In a larger bowl beat together the sugar, shredded zucchini, vanilla, and egg. Add oil, mix well. Stir flour mixture into zucchini mixture, half at a time.
  4. Gently fold in chocolate chips. Mix well.
  5. Spoon batter into well greased muffin tin. Bake for 35-40 minutes or until wooden pick inserted near center comes out clean. (It’s hard to judge these by color.)
  6. Remove from oven and let cool in pan for 15 minutes.
  7. Remove from pan and cool thoroughly on a rack. Place each muffin into individual sandwich bags.
  8. Makes 6 large or 12 small muffins.


 Posted by at 8:24 am
Sep 012012
 

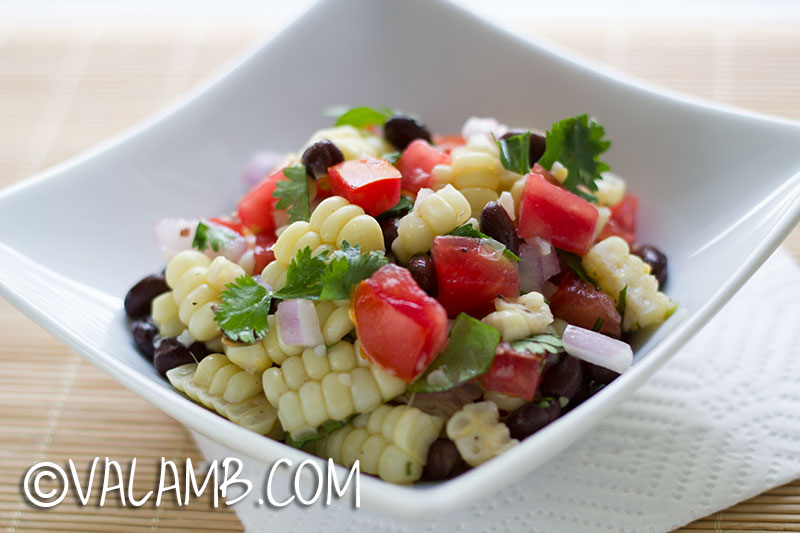
corn and bean salad

I don’t consider myself a dooms day kind of person, but all the same, I like the feeling of being prepared no matter what may come our way. It must come from my homesteading roots. I *blushingly* confess I use a 24” tool box to store my first aid supplies. I have a generator in the garage. And after years of feeding four children, I probably have enough food put up to feed a small army.

Okay, so most of the meat doesn’t count as it is specifically for the farmers markets. But I have a wonderful selection of dried beans and I buy my rice, flour, and sugar in twenty five pound bags. My biggest infatuation though is freezing and preserving my way through the summer months. Given all this, it is pretty safe to say our pantry and larder are comfortably full.

Did I mention beans? ;-) I keep a selection of dried kidney beans, black beans, white beans, cranberry beans, and garbanzo beans always on hand. I also normally have dried split peas, various lentils, and pearl barley too. I love creating main dishes, usually soups, stews, and chilies, with these easy to store pantry staples. But in the summer, I am always looking for ways to incorporate these ingredients into delicious salads and sides.

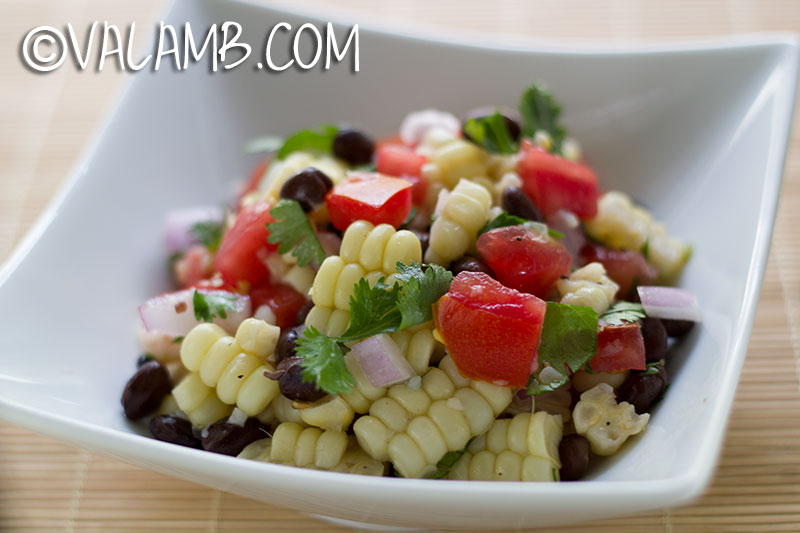
I am not sure how much longer we will have sweet corn but I intend to get my fill while the season lasts. Here is an easy salad Jordan and I created with some leftover corn on the cob. For quick summer recipes like this, I try to keep canned black beans on hand. With a little planning, cooked (dried) beans would work very well too.

The rule for most dried beans is:

1 pound dried beans = 2 cups dried beans = 5 cups cooked beans

Corn Off the Cob and Black Bean Salad
 

Ingredients
  • 4 ears sweet corn, cut off the cob
  • 1 – 15 oz can black beans, rinsed
  • 1 large tomato, seeded and diced
  • ½ red onion, diced
  • ½ cup cilantro, chopped
  • 1 tablespoon olive oil
  • salt and pepper, to taste

Instructions
  1. Cook corn in boiling water for 12 minutes. Once the corn is cool enough to handle, use a sharp knife and cut corn off the cob. Use the back of your knife and run the knife up and down the cob to remove the last bits of corn clinging to the cob.
  2. Meanwhile rinse black beans and let drain until almost dry. Remove seeds from tomato and dice into ½ pieces. Dice onion. Rough chop washed cilantro.
  3. Mix corn, black beans, tomatoes, onions, and cilantro in a large bowl. Drizzle with olive oil and season with salt and pepper.


 Posted by at 8:18 am
Aug 292012
 

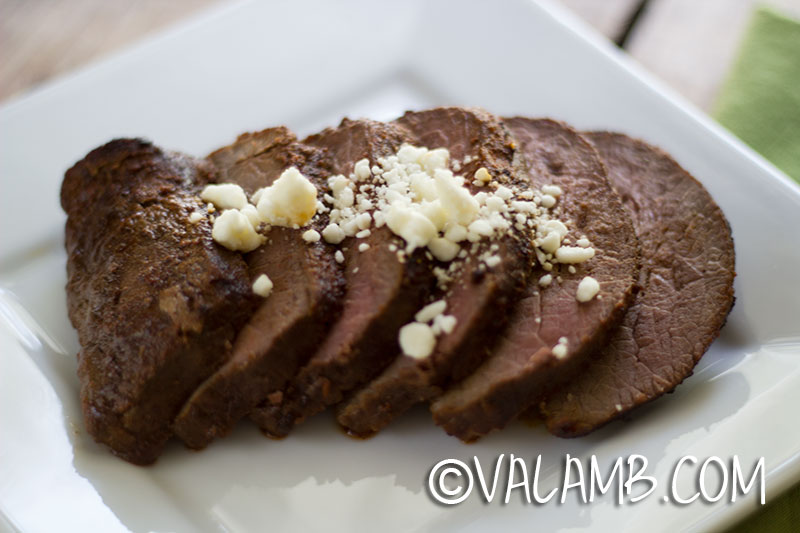
venison

Both of my boys love to cook and are quite good at it. My oldest son spent years as the head cook in a local restaurant. My youngest, well, he has become the true hunter-gather of the family.

This past winter Brady shot his first deer, a historical passage from boy- into manhood. Corey and I believe experiential learning is the best teacher, so Corey did his best to turn this opportunity into a learning experience.

All of my children have been in the cooler at the processing plant and have seen a whole steer, hog, and lamb hanging before it is cut and packaged. Corey often organizes carcass workshops for local 4-H kids so they can visualize how meat is graded as well as understand where the cuts of meat are located. The more they can connect pasture to plate the more respect they have for their job raising animals. However, a carcass before it has been cut into steaks still looks like a big hunk of meat. We wanted Brady to have a deeper connection now that he was interested in hunting.

first deerBrady shot his deer on the last day of hunting season. With Corey’s help, Brady gutted and prepared the deer for harvesting. An Old Hunter stopped by the farm and offered to assist the guys in cutting and packaging the deer. As the Old Hunter efficiently broke down the carcass, Corey and Brady diligently wrapped every steak and roast. To pass the time the Old Hunter, having hunted for decades, recounted his years of experience. Many of the stories shared that day were priceless antiquities of another era – echoing the age old need to put food on the table. Collectively, all of them gave Brady an even greater respect between hunter and prey. That day Brady and Corey stepped back in time, sharing a moment between father and son as old as mankind.

If Brady is not busy making deer jerky, you might talk him into fixing you a burger or even a steak. But one thing is for sure, when Brady’s cooking dinner, venison is always on the menu.

Below is one of Brady’s favorite meat rubs. He uses it most often on venison but it works equally well on beef.

Memphis Style Rub
 

Ingredients
  • ¼ cup paprika
  • 2 tablespoons salt
  • 2 tablespoons onion powder
  • 2 tablespoons black pepper
  • 2 teaspoons of cayenne pepper

Instructions
  1. Place all ingredients in an airtight container. Shake until mixed thoroughly. Store out of direct sunlight in a cool place.
  2. When ready to use, generously sprinkle spices onto meat. Spices should completely coat surface of meat.
  3. Let marinate in refrigerator for at least 30 minutes.
  4. Cook meat as desired. Recommend grilling, pan searing, or broiling.


 Posted by at 8:13 am
Aug 202012
 

tomato tart

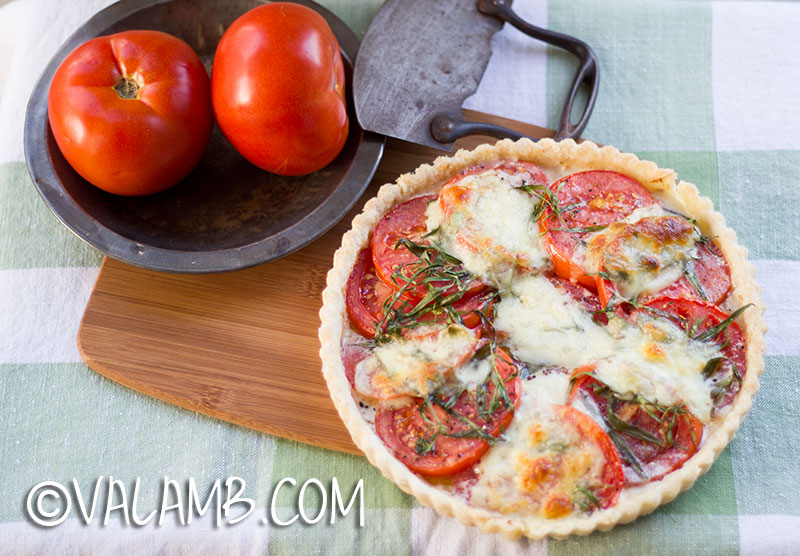
Ever since the first tomatoes hit the farmers market this year, I have been craving a tomato tart.  All warm and savory, it is like being able to taste summer in every bit. I confess, I have never made one before – but I could close my eyes and taste the flavors I was after.

Because I planned on using a fairly shallow tart pan and was certain the dough would hold up, I decided to use the Pâte Brisée recipe. Be sure to read Choosing the Perfect Dough for the Job.

For the Pastry (single crust):

  • 1/2 cup butter, unsalted
  • 1 1/2 cups flour
  • 1/2 teaspoon salt
  • 1/2 teaspoon sugar
  • 1/4 – 1/3 cup very cold water

For the Tart:

  • 3 large Roma Tomatoes, sliced 1/4 inch thick
  • 1 tablespoon Dijon Mustard
  • 1/2 cup Fresh Tarragon
  • 4 oz of Fresh Mozzarella Cheese, sliced 1/4 inch thick
  • 1 tablespoon Olive Oil
  • Salt and Pepper, to taste

Making the Pastry:

Cut the butter into very thin slices and place in freezer for 30 minutes. Meanwhile, mix flour, salt, and sugar in large bowl. Place bowl in freezer for 15 minutes.

Add butter to flour and toss. Using fingers work the butter into the flour with a rubbing action. You still want to be able to see small flakes of butter in the flour. If the butter begins to warm, return bowl to freezer.

Add water, starting with 1/3 cup. Work dough, pressing together. If dough does not begin to hold its shape, add more water, 1 tablespoon at a time. Use only enough to form a ball. It will be crumbly but still hold its shape. Press into disk.

Wrap dough in plastic wrap and refrigerate for 30 minutes to 1 hour.

When ready to use, remove from refrigerator, unwrap, cut in half and roll out on floured surface. Keep the other half wrapped in frig until ready to use.

Assembling the Tart:

Preheat oven to 400 degrees.

Roll the dough out to 1/8 inch in a 12-inch circle. Transfer dough to tart pan with removable bottom. Press dough into corners and trim so it is flush with sides. (I roll my rolling pin across the top of tart pan to cut pastry.) Chill in refrigerator for 30 minutes.

Remove from frig. Brush bottom of pastry shell with Dijon mustard.

Arrange tomatoes on pastry so they overlap slightly. Drizzle with olive oil and season with salt and freshly cracked pepper. Add tarragon evenly over tomatoes. Top with Mozzarella cheese.

Bake tart for 45 minutes or until crust is golden brown. Remove from oven and cool for 20 minutes. Serve warm.

Note: With my first attempt I used Better Boy tomatoes out of the garden. Although delicious, it created too much liquid in the tart. I made the recipe again using Roma tomatoes which resulted in a much more desirable tart. One that was easier to slice and serve.

tomato tart

Related Posts Plugin for WordPress, Blogger...

 Posted by at 7:50 am