Aug 292012
 

venison

Both of my boys love to cook and are quite good at it. My oldest son spent years as the head cook in a local restaurant. My youngest, well, he has become the true hunter-gather of the family.

This past winter Brady shot his first deer, a historical passage from boy- into manhood. Corey and I believe experiential learning is the best teacher, so Corey did his best to turn this opportunity into a learning experience.

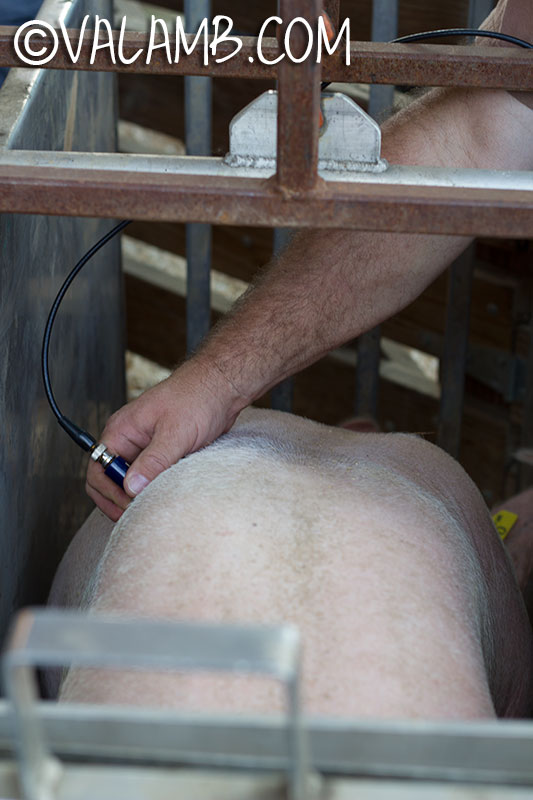
All of my children have been in the cooler at the processing plant and have seen a whole steer, hog, and lamb hanging before it is cut and packaged. Corey often organizes carcass workshops for local 4-H kids so they can visualize how meat is graded as well as understand where the cuts of meat are located. The more they can connect pasture to plate the more respect they have for their job raising animals. However, a carcass before it has been cut into steaks still looks like a big hunk of meat. We wanted Brady to have a deeper connection now that he was interested in hunting.

first deerBrady shot his deer on the last day of hunting season. With Corey’s help, Brady gutted and prepared the deer for harvesting. An Old Hunter stopped by the farm and offered to assist the guys in cutting and packaging the deer. As the Old Hunter efficiently broke down the carcass, Corey and Brady diligently wrapped every steak and roast. To pass the time the Old Hunter, having hunted for decades, recounted his years of experience. Many of the stories shared that day were priceless antiquities of another era – echoing the age old need to put food on the table. Collectively, all of them gave Brady an even greater respect between hunter and prey. That day Brady and Corey stepped back in time, sharing a moment between father and son as old as mankind.

If Brady is not busy making deer jerky, you might talk him into fixing you a burger or even a steak. But one thing is for sure, when Brady’s cooking dinner, venison is always on the menu.

Below is one of Brady’s favorite meat rubs. He uses it most often on venison but it works equally well on beef.

Memphis Style Rub
 

Ingredients
  • ¼ cup paprika
  • 2 tablespoons salt
  • 2 tablespoons onion powder
  • 2 tablespoons black pepper
  • 2 teaspoons of cayenne pepper

Instructions
  1. Place all ingredients in an airtight container. Shake until mixed thoroughly. Store out of direct sunlight in a cool place.
  2. When ready to use, generously sprinkle spices onto meat. Spices should completely coat surface of meat.
  3. Let marinate in refrigerator for at least 30 minutes.
  4. Cook meat as desired. Recommend grilling, pan searing, or broiling.


 Posted by at 8:13 am
Aug 272012
 

buttermilkI don’t know if it is from years of growing up on a dairy farm or if I am just a milk-yogurt-cheese-butter addict, but at any given time our frig is half full of dairy products. And ever since I began making our Rosemary Cornbread you can find a large container of buttermilk in there as well.

With it always on hand, I have found tons of other uses for the thick, delicious stuff. We make pancakes and biscuits and even salad dressing.  But when I recently read in one of my farming magazines that I could make my own, I was truly intrigued.

As it turns out, it is actually quite simple. In addition to a quart canning jar or other glass container with a lid, you will need:

  • ½ cup of store bought buttermilk
  • 1 quart of milk (2%, whole, or raw)

Instructions

Pour buttermilk into clean jar. If this is your first batch, I recommend ½ cup of buttermilk to get started. Then fill the remainder of the jar with milk. Secure lid and shake vigorously. Allow to sit on the counter overnight away from any direct source of heat. Refrigerate after 12 hours.

Every two weeks keep back at least ¼ cup of the buttermilk culture and top off with fresh milk. Because of the amount of buttermilk we go through, I re-culture mine every week.

You can keep this process going for every. And that gets two thumbs up from this farm girl!

homemade buttermilk

 Posted by at 8:00 am
Aug 212012
 

Whether you were hoping to can peaches, make your own salsa, or put up some of your favorite jams… you still have time. Here is an easy to read chart of what you can find in season each month in Virginia. Live elsewhere? Check with your local Cooperative Extension office or state Ag Department for similar charts.

produce chart


 Posted by at 8:03 am
Aug 202012
 

tomato tart

Ever since the first tomatoes hit the farmers market this year, I have been craving a tomato tart.  All warm and savory, it is like being able to taste summer in every bit. I confess, I have never made one before – but I could close my eyes and taste the flavors I was after.

Because I planned on using a fairly shallow tart pan and was certain the dough would hold up, I decided to use the Pâte Brisée recipe. Be sure to read Choosing the Perfect Dough for the Job.

For the Pastry (single crust):

  • 1/2 cup butter, unsalted
  • 1 1/2 cups flour
  • 1/2 teaspoon salt
  • 1/2 teaspoon sugar
  • 1/4 – 1/3 cup very cold water

For the Tart:

  • 3 large Roma Tomatoes, sliced 1/4 inch thick
  • 1 tablespoon Dijon Mustard
  • 1/2 cup Fresh Tarragon
  • 4 oz of Fresh Mozzarella Cheese, sliced 1/4 inch thick
  • 1 tablespoon Olive Oil
  • Salt and Pepper, to taste

Making the Pastry:

Cut the butter into very thin slices and place in freezer for 30 minutes. Meanwhile, mix flour, salt, and sugar in large bowl. Place bowl in freezer for 15 minutes.

Add butter to flour and toss. Using fingers work the butter into the flour with a rubbing action. You still want to be able to see small flakes of butter in the flour. If the butter begins to warm, return bowl to freezer.

Add water, starting with 1/3 cup. Work dough, pressing together. If dough does not begin to hold its shape, add more water, 1 tablespoon at a time. Use only enough to form a ball. It will be crumbly but still hold its shape. Press into disk.

Wrap dough in plastic wrap and refrigerate for 30 minutes to 1 hour.

When ready to use, remove from refrigerator, unwrap, cut in half and roll out on floured surface. Keep the other half wrapped in frig until ready to use.

Assembling the Tart:

Preheat oven to 400 degrees.

Roll the dough out to 1/8 inch in a 12-inch circle. Transfer dough to tart pan with removable bottom. Press dough into corners and trim so it is flush with sides. (I roll my rolling pin across the top of tart pan to cut pastry.) Chill in refrigerator for 30 minutes.

Remove from frig. Brush bottom of pastry shell with Dijon mustard.

Arrange tomatoes on pastry so they overlap slightly. Drizzle with olive oil and season with salt and freshly cracked pepper. Add tarragon evenly over tomatoes. Top with Mozzarella cheese.

Bake tart for 45 minutes or until crust is golden brown. Remove from oven and cool for 20 minutes. Serve warm.

Note: With my first attempt I used Better Boy tomatoes out of the garden. Although delicious, it created too much liquid in the tart. I made the recipe again using Roma tomatoes which resulted in a much more desirable tart. One that was easier to slice and serve.

tomato tart

 Posted by at 7:50 am
Aug 172012
 

peach galette

 peach galette

Now that I found the perfect pie crust to hold its shape with this free form dessert, I was ready to give it another go. You see, I made a peach galette a couple of weeks ago. I took a pretty picture of it before it went into the oven, but by the time it was done I had a perfect mess! The pie crust failed. It failed to hold its shape and it failed to hold its contents. I still had no problem finding eager eaters, but it was hardly a recipe to write about.

peach galette

Why had my delicious, flakey butter crust let me down? As it turns out, my pie dough was perfect — perfect for a pie baked in a pie pan, but I needed more binding for my rustic shaped galette. Be sure to read Choosing the Perfect Dough for the Job. (I’ve copied the recipe here for your convenience.)

For the Pastry:

  • 1 1/2 cup flour
  • 1/2 cup butter, unsalted
  • 1/2 teaspoon salt
  • 1/4 cup sugar
  • 1 egg yolk, beaten (save egg white for later)
  • 2-4 tablespoons very cold water

For the Galette Filling:

  • 4 large peaches, pitted and cut into wedges
  • 1/2 cup sugar, plus more to sprinkle formed galette
  • 2 tablespoons lemon juice
  • 2 tablespoons corn starch
  • Pinch of salt

Making the Pastry:

Cut the butter into very thin slices and place in freezer for 30 minutes. Meanwhile, mix flour and salt in large bowl. Place bowl in freezer for 15 minutes.

Add butter to flour and toss. Using fingers work the butter into the flour with a rubbing action. Continue until dough resembles a course crumble – in this dough you do not want to see small flakes of butter in the flour. If the flour/butter begins to warm, return bowl to freezer.

Add sugar and mix.

Add beaten egg and 2 tablespoons of water. Dump dough onto unfloured surface. If dough does not begin to hold its shape, add more water, 1 tablespoon at a time.

Knead the dough in long smooth strokes three or four times. Form the dough into a ball. Press down forming a disk. (This dough is much smoother than the Pâte Brisée.)

Wrap ball in plastic wrap and refrigerate for 30 minutes to 1 hour.

When ready to use, remove from refrigerator. Unwrap. Using minimal flour on rolling pen, roll out dough on top of the plastic wrap. (See Pâte Brisée)

Making the Galette:

Preheat oven to 375 degrees.

Roll the dough out to 1/8 inch in a 14-inch circle. Transfer dough to a parchment lined baking sheet. Refrigerate until ready to use.

Place peaches in large bowl. Add sugar, lemon juice, cornstarch, and salt. Mix until peaches are thoroughly coated.

Arrange fruit in center of chilled dough, leaving approximately 2 inches around the outside free of fruit.

Gently fold dough up and over fruit. Be sure to press edges together to create pleats to hold fruit.

Brush pastry with egg white and sprinkle with sugar.

Bake for 45 minutes or until crust is golden brown. Remove from oven and let cool on baking sheet. Best served warm.

fresh peaches


 Posted by at 8:10 am
Aug 152012
 

And as many of you know, I am much more into cooking than baking, as I am truly a dump and explore kind of girl. But even so, it was time to make a pie. I have no idea why I don’t make them more often. They seem intimidating, and then I make one, and ask myself for the hundredth time, what was all the fuse about. My mother use to whip up pies, like I do savories. She won so many grand champion ribbons with her pies that the county fair’s homemaking department ask her to take a time out and give someone else a chance. Hmmm, now there is a challenge (and I love challenges!).

pastry dough

So I dug through my old trusted recipe file for my go to pie dough (a hand-me-down from Mom). It had been a while since I baked a pie and was disappointed to be reminded that one of the key ingredients was shortening — hydrogenated oil. Oh, boy, time to tweak the recipe.

After several pies, tarts, and even a galette, I have learned that all pie crusts are not created equal. I perfected my butter pie crust but my galette (freeform) crust failed to hold its shape. So after a lot of reading, testing, and tweaking, I have narrowed it down to two main recipes depending on my needs.

Regardless of which one you use, keep in mind the three cardinal rules when it comes to pastry dough.

  1. Keep it cold.
  2. Work quickly.
  3. The dryer the flakier.

 unsalted butter

Pâte Brisée (broken dough)

This is the dough we think of when we remember our mom’s (or grandmom’s) wonderfully flakey pie crust. This works best for fruit pies, lattice crusts, and savory dishes (for savory pies, reduce sugar to 1 teaspoon).

Recipe for Double Crust

  • 1 cup butter, unsalted
  • 2 1/2 cups flour
  • 1 teaspoon salt
  • 1 tablespoons sugar
  • 1/3 – 1/2 cup very cold water

Cut the butter into very thin slices and place in freezer for 30 minutes. Meanwhile, mix flour, salt, and sugar in large bowl. Place bowl in freezer for 15 minutes.

Add butter to flour and toss. Using fingers work the butter into the flour with a rubbing action. You still want to be able to see small flakes of butter in the flour. If the butter begins to warm, return bowl to freezer.

Add water, starting with 1/3 cup. Work dough, pressing together. If dough does not begin to hold its shape, add more water, 1 tablespoon at a time. Use only enough to form a ball. It will be crumbly but still hold its shape. Press into disk.

Wrap dough in plastic wrap and refrigerate for 30 minutes to 1 hour.

When ready to use, remove from refrigerator, unwrap, cut in half and roll out on floured surface. Keep the other half wrapped in frig until ready to use.

Pâte Sucrée (sweet dough)

This is a great dough for tarts or freeform galettes. This dough will stand on its own without the support of a pie pan and it is sweeter in flavor.

Recipe for Single Crust

  • 1 1/2 cup flour
  • 1/2 cup butter, unsalted
  • 1/2 teaspoon salt
  • 1/4 cup sugar
  • 1 egg yolk, beaten
  • 2-4 tablespoons very cold water

Cut the butter into very thin slices and place in freezer for 30 minutes. Meanwhile, mix flour and salt in large bowl. Place bowl in freezer for 15 minutes.

Add butter to flour and toss. Using fingers work the butter into the flour with a rubbing action. Continue until dough resembles a course crumble – in this dough you do not want to see small flakes of butter in the flour. If the flour/butter begins to warm, return bowl to freezer.

Add sugar and mix.

Add beaten egg and 2 tablespoons of water. Dump dough onto unfloured surface. If dough does not begin to hold its shape, add more water, 1 tablespoon at a time.

Knead the dough in long smooth strokes three or four times. Form the dough into a ball. Press down forming a disk. (This dough is much smoother than the Pâte Brisée.)

Wrap ball in plastic wrap and refrigerate for 30 minutes to 1 hour.

When ready to use, remove from refrigerator. Unwrap. Using minimal flour on rolling pen, roll out dough on top of the plastic wrap.

 Posted by at 8:04 am
Aug 132012
 

lamb and vegetable kabobsI think I have mentioned it before, but I live in a house full of picky eaters. I guess I shouldn’t say that. My kids eat a wide variety of fruits, vegetables, and ethnic dishes, having been exposed to so many new ingredients through the farmers markets. It would be more accurate to say that everyone in my house likes *different* things. Either way, creating a meal can be a bit tricky.

Kebabs (also known as kabobs) are a great way to give everyone in the house exactly what they want. Corey can have his without onions and the kids can customize their own kebabs just they way they like them! I like living on the wild side with a little of everything.

Grilled Lamb & Vegetable Kebabs with Dipping Sauce

12 wooden skewers (10-inch)
1/4 cup olive oil
3 garlic cloves, peeled and smashed
2 pounds boneless lamb (leg or shoulder), cut into 1-inch pieces
1 medium red onion, halved then quartered, cut into 1-inch pieces (keep layers intact)
2 small zucchini, cut crosswise into 1/2-inch rounds
2 small yellow squash, cut crosswise into 1/2-inch rounds
2 red bell peppers, cut into 1/2-inch pieces
Salt and pepper

Place wooden skewers in a shallow dish and cover with water; set aside.

In a small saucepan over low heat, simmer oil and garlic until garlic is golden brown, about 3 minutes. Transfer to a small bowl; set aside to cool.

Thread 6 skewers, alternating lamb and onion. Thread remaining 6 skewers with zucchini, squash and pepper. Brush lamb and vegetable kabobs with garlic oil and season with salt and pepper. Place skewers on a hot grill rack. Cover and cook, turning occasionally, until each side has grill marks and lamb is cooked through, about 8 to 10 minutes or until lamb reaches 160ºF for medium doneness.

Remove from grill. Serve with dipping sauces and whole wheat pita.

Honey Mustard Thyme Dipping Sauce

3 tablespoons coarse grain mustard
1 tablespoon mayonnaise
1 tablespoon honey
2 teaspoons chopped fresh thyme
Salt and pepper

In a small bowl, combine mustard, mayonnaise, honey, thyme, salt and pepper.

Cucumber Yogurt Sauce

1/4 cup Greek yogurt
1/2 cucumber, peeled, seeded and finely chopped
2 teaspoons chopped fresh dill
Salt and pepper

In a small bowl, combine yogurt, cucumber, dill, salt and pepper

Recipe and image provided by the American Lamb Board.

 Posted by at 8:00 am
Aug 112012
 

cookies

August is county fair season. And I can safely say that I have never missed a county fair in 25 35, okay, 40-something years. I mean ever! I was born in November and by the following August I was in a baby stroller attending my first fair. From the age of 9 to 19 I showed Jersey cows. Every year my family loaded up bags of feed, hay bales, straw, pitchforks, buckets, brushes, halters, hoses, cattle clippers, and portable milking equipment and headed to the county fair. We would arrive at the fairgrounds with a trailer load of cows from 6 months to 12 years old, filling half the barn. It was always a family affair including grandparents, aunts, uncles, great aunts, great uncles and cousins galore. My Grandfather Bob, along with my father and uncles built many of the barns still there today.

For those of you who may not be familiar with Jerseys, they are a beautiful fawn colored dairy cow. They can be brown and white or can range from very light solid brown to almost black. I should also mention that I grew up in a family with a very sarcastic sense of humor. So what would start off on Monday as very informative answers to common urbanite questions often gave way to quick wit and humor by the end of a very long and exhausting week. One year we had a black Jersey cow in the show herd and by Friday my uncles had convinced most of the innocent city folk passing through that she gave chocolate milk.  Sigh…

cookiesGetting married didn’t end my county fair career, it only perpetuated another generation of county fair goers. Like me, Corey grew up attending his county fair every year. His Grandfather David was fair president and his Grandmother Boots (the other side of the family) manned the information desk for years. As newlyweds, we exhibited purebred sheep and before long our children were following our footsteps showing livestock of their own. They have shown dairy cows, beef cows, sheep, hogs, rabbits and goats. This year my youngest daughter will be showing her very first chickens.

The county fair is so much more than animals, barbeque chicken dinners, carnival rides, and funnel cakes. Oh, don’t misunderstand, those are all important necessities. But the county fair is also the time of year when the whole community comes together to socialize, reconnecting with friends you haven’t seen in years (or since last year) and sharing stories with neighbors. It is the very essence of community.

Inspired by fellow blogger Tara Weaver of Tea & Cookie, I decided to reflect on the community I live in and offer my neighbors some face to face handshakes and hugs. I have met so many wonderful people through my food blog and Twitter. But I also need to remember to take my passion for food, bake a batch of cookies, stir up some sweet tea and share myself with my offline community too.

cookies

When it comes to chocolate chip cookies, there is simply nothing better than the real thing. I always follow the Original Nestle Toll House recipe as reprinted below.

Nestle Toll House Chocolate Chip Cookies
 

Ingredients
  • 2¼ cups all-purpose flour
  • 1 teaspoon baking soda
  • 1 teaspoon salt
  • 1 cup butter or margarine, softened
  • ¾ cup granulated sugar
  • ¾ cup packed brown sugar
  • 1 teaspoon vanilla extract
  • 2 large egg
  • 1 (12 ounce) package semi-sweet chocolate morsels

Instructions
  1. Preheat oven to 375 degrees F.
  2. Combineflour, baking soda and salt in small bowl.
  3. Beat butter, granulated sugar, brown sugar and vanilla extract in large mixer bowl until creamy. Add eggs one at a time, beating well after each addition.
  4. Gradually beat in flour mixture.
  5. Stir in morsels. Drop by rounded tablespoon onto ungreased baking sheets.
  6. Bake for 9 to 11 minutes or until golden brown.
  7. Cool on baking sheets for 2 minutes; remove to wire racks to cool completely.

 Posted by at 8:04 am
Aug 092012
 

Whenever I make Old Fashioned Spaghetti Sauce, I always freeze a couple of pints. These make great back up dinner meals on hectic weeknights. Just thaw, reheat and serve over spaghetti noodles or use to make any number of other pasta dishes.

baked ziti

baked ziti


Weeknight Baked Ziti
 

Ingredients
  • 1 pint frozen Old Fashioned Spaghetti Sauce
  • 1 cup dried ziti or penne pasta
  • ½ cup ricotta cheese
  • ⅔ cup shredded mozzarella cheese
  • ¼ cup freshly grated Parmesan cheese

Instructions
  1. Bring salted water to a boil. Meanwhile reheat spaghetti sauce over low heat
  2. Cook pasta as directed on box. Remove from heat and drain. Return noodles to pan, add half of the spaghetti sauce and stir until thoroughly coated. Transfer sauce covered pasta immediately to baking dish.
  3. In a small bowl, mix together ricotta and Parmesan cheeses. Using a spoon, place dollops of cheese mixture evenly over pasta. Cover with remaining spaghetti sauce. Top with mozzarella cheese.
  4. Place baking dish under broiler until cheese has melted and begins to brown.
  5. Serves two.

Notes
I often pop the frozen sauce out of its container and place directly into a small pan to reheat. Just be sure to keep the heat low, stirring often. By the time your noodles are ready, your sauce should be nice and hot.

Related Posts Plugin for WordPress, Blogger...

 Posted by at 12:30 pm