Mar 242013
 

Good Start SmoothieOkay, enough already! I have been fighting a cold all week and today, finally, I decided to put my foot down! No more.

I have seen my share of doctors the past couple of months and greatly appreciate their services. I wouldn’t be walking limp free without a very wonderful doctor. But I am a bit tired of the eye rolls I get whenever I discuss nutrition or more natural alternatives instead of prescription medications.

My rheumatologist won’t even consider that my RA could be linked to food or at least minimized by eating/omitting certain foods. A physician assistant recently totally ignored my excited report that chamomile tea bags helped calm a rash I had on the top of my foot. One that appears only on my foot that was operated on… AND one that three doctors have given me three different diagnosis for. It’s crazy that the daily news is full of all the foods we should and shouldn’t eat, yet repeatedly I run into medical professionals who won’t even listen to the effects of food on one’s energy level, mood, and overall feeling of well-being from the one person who spends 24/7 in my body… ME.

So to that end, I have decided to bombard my cold with nutrition! And what better way to start than with a healthy smoothie.
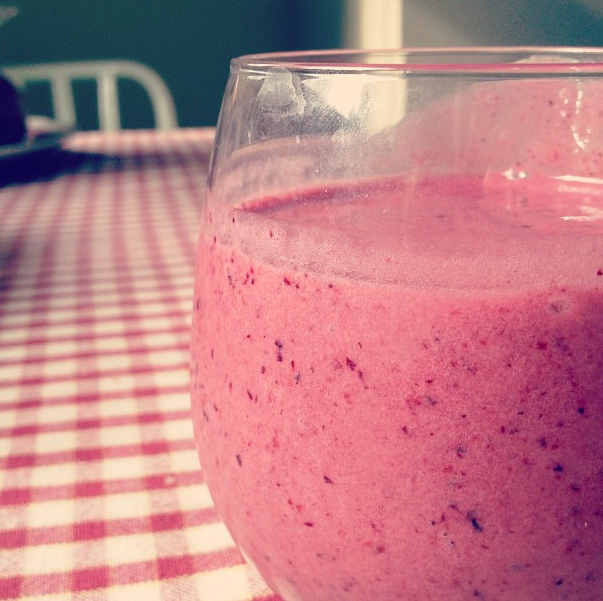
Good Start Smoothie

Strawberries: Contain Folate and Potassium as well as a very good source of Dietary Fiber, Vitamin C and Manganese.

Blueberries: Another good source of Dietary Fiber and Manganese and packed with Vitamin C. Blueberries are known for their polyphenols – which have both antioxidant and anti-inflammatory properties.

Elderberries: Contain an astounding 60% of Vitamin C, 12% of Vitamin A, 11% of Vitamin B6, as well as Thiamin and Riboflavin. They have powerful antiviral and anti-inflammatory properties thought to sooth coughs, sore throats, bronchial infections and to make sinus conditions looser.

Yogurt: Contains Calcium and Vitamin D along with good bacteria for the digestive tract. (Could easily be omitted. I add yogurt for a smoother texture and to be sure I am getting a dose of my daily calcium.)

Orange Juice: Contains Thiamin, Folate and Potassium and is a very good source of Vitamin C.

Banana: A good source of Dietary Fiber, Vitamin C, Potassium and Manganese, and very high in Vitamin B6.

Good Start Smoothie
 

Ingredients
  • ½ banana
  • 2 handfuls of frozen strawberries
  • 1 handful of frozen blueberries
  • 3 tablespoons of organic yogurt
  • ¼ cup elderberry syrup
  • ½ cup orange juice

Instructions
  1. Starting with banana and add all ingredients to blender. Blend until completely smooth. Add more orange juice as necessary for desired consistency.

Notes
Serves 2


 Posted by at 11:26 pm
Sep 072012
 

moroccan lamb tagine

This is one of the first Moroccan Lamb Tagines I created years ago. I started with a rather complicated recipe I found in a North African cookbook and simplified it to maximize taste while keeping ingredients easy to find, most of which I keep on hand. 

 moroccan lamb tagine

Moroccan Tagine with Apricots and Honey
 

Ingredients
  • 2-3 pounds lamb shoulder chops
  • 1 teaspoon ground turmeric
  • 1 teaspoon ground ginger
  • 1 teaspoon ground cinnamon
  • ½ teaspoon fresh cracked pepper
  • 1 teaspoon salt
  • 2 tablespoons olive oil
  • 2 large onions, halved and sliced
  • 3 garlic cloves, minced
  • 1 cup chicken stock
  • 1 – 14.5 oz can diced tomatoes
  • 8 threads saffron, crushed
  • 2 tablespoons honey
  • 12 fresh cilantro, chopped
  • 1 cup dried apricots
  • ½ cup golden raisins

Instructions
  1. Preheat oven to 325 degrees.
  2. Cut lamb into one inch boneless cubes. Season with turmeric, ginger, cinnamon, pepper and salt.
  3. Heat 1 tablespoon of olive oil in heavy bottom Dutch oven over medium high heat. Add lamb in small batches to allow for plenty of room. Using tongs turn meat and brown on all sides. Remove lamb and set aside. Repeat until all lamb is browned. Set aside.
  4. Add sliced onion and garlic to Dutch oven. Cook until onions are translucent, scraping bottom of pan to release all the browned bits. Add cooked lamb, chicken stock, diced tomatoes, saffron, honey, cilantro, apricots, and raisins to pan.
  5. Remove from stove, cover and place in a 325 degree preheated oven and cook for 1½ to 2 hours or until meat is fork tender.
  6. Serve over jasmine rice or couscous.

 Posted by at 8:30 am
Aug 172012
 

peach galette

 peach galette

Now that I found the perfect pie crust to hold its shape with this free form dessert, I was ready to give it another go. You see, I made a peach galette a couple of weeks ago. I took a pretty picture of it before it went into the oven, but by the time it was done I had a perfect mess! The pie crust failed. It failed to hold its shape and it failed to hold its contents. I still had no problem finding eager eaters, but it was hardly a recipe to write about.

peach galette

Why had my delicious, flakey butter crust let me down? As it turns out, my pie dough was perfect — perfect for a pie baked in a pie pan, but I needed more binding for my rustic shaped galette. Be sure to read Choosing the Perfect Dough for the Job. (I’ve copied the recipe here for your convenience.)

For the Pastry:

  • 1 1/2 cup flour
  • 1/2 cup butter, unsalted
  • 1/2 teaspoon salt
  • 1/4 cup sugar
  • 1 egg yolk, beaten (save egg white for later)
  • 2-4 tablespoons very cold water

For the Galette Filling:

  • 4 large peaches, pitted and cut into wedges
  • 1/2 cup sugar, plus more to sprinkle formed galette
  • 2 tablespoons lemon juice
  • 2 tablespoons corn starch
  • Pinch of salt

Making the Pastry:

Cut the butter into very thin slices and place in freezer for 30 minutes. Meanwhile, mix flour and salt in large bowl. Place bowl in freezer for 15 minutes.

Add butter to flour and toss. Using fingers work the butter into the flour with a rubbing action. Continue until dough resembles a course crumble – in this dough you do not want to see small flakes of butter in the flour. If the flour/butter begins to warm, return bowl to freezer.

Add sugar and mix.

Add beaten egg and 2 tablespoons of water. Dump dough onto unfloured surface. If dough does not begin to hold its shape, add more water, 1 tablespoon at a time.

Knead the dough in long smooth strokes three or four times. Form the dough into a ball. Press down forming a disk. (This dough is much smoother than the Pâte Brisée.)

Wrap ball in plastic wrap and refrigerate for 30 minutes to 1 hour.

When ready to use, remove from refrigerator. Unwrap. Using minimal flour on rolling pen, roll out dough on top of the plastic wrap. (See Pâte Brisée)

Making the Galette:

Preheat oven to 375 degrees.

Roll the dough out to 1/8 inch in a 14-inch circle. Transfer dough to a parchment lined baking sheet. Refrigerate until ready to use.

Place peaches in large bowl. Add sugar, lemon juice, cornstarch, and salt. Mix until peaches are thoroughly coated.

Arrange fruit in center of chilled dough, leaving approximately 2 inches around the outside free of fruit.

Gently fold dough up and over fruit. Be sure to press edges together to create pleats to hold fruit.

Brush pastry with egg white and sprinkle with sugar.

Bake for 45 minutes or until crust is golden brown. Remove from oven and let cool on baking sheet. Best served warm.

fresh peaches


 Posted by at 8:10 am
Aug 152012
 

And as many of you know, I am much more into cooking than baking, as I am truly a dump and explore kind of girl. But even so, it was time to make a pie. I have no idea why I don’t make them more often. They seem intimidating, and then I make one, and ask myself for the hundredth time, what was all the fuse about. My mother use to whip up pies, like I do savories. She won so many grand champion ribbons with her pies that the county fair’s homemaking department ask her to take a time out and give someone else a chance. Hmmm, now there is a challenge (and I love challenges!).

pastry dough

So I dug through my old trusted recipe file for my go to pie dough (a hand-me-down from Mom). It had been a while since I baked a pie and was disappointed to be reminded that one of the key ingredients was shortening — hydrogenated oil. Oh, boy, time to tweak the recipe.

After several pies, tarts, and even a galette, I have learned that all pie crusts are not created equal. I perfected my butter pie crust but my galette (freeform) crust failed to hold its shape. So after a lot of reading, testing, and tweaking, I have narrowed it down to two main recipes depending on my needs.

Regardless of which one you use, keep in mind the three cardinal rules when it comes to pastry dough.

  1. Keep it cold.
  2. Work quickly.
  3. The dryer the flakier.

 unsalted butter

Pâte Brisée (broken dough)

This is the dough we think of when we remember our mom’s (or grandmom’s) wonderfully flakey pie crust. This works best for fruit pies, lattice crusts, and savory dishes (for savory pies, reduce sugar to 1 teaspoon).

Recipe for Double Crust

  • 1 cup butter, unsalted
  • 2 1/2 cups flour
  • 1 teaspoon salt
  • 1 tablespoons sugar
  • 1/3 – 1/2 cup very cold water

Cut the butter into very thin slices and place in freezer for 30 minutes. Meanwhile, mix flour, salt, and sugar in large bowl. Place bowl in freezer for 15 minutes.

Add butter to flour and toss. Using fingers work the butter into the flour with a rubbing action. You still want to be able to see small flakes of butter in the flour. If the butter begins to warm, return bowl to freezer.

Add water, starting with 1/3 cup. Work dough, pressing together. If dough does not begin to hold its shape, add more water, 1 tablespoon at a time. Use only enough to form a ball. It will be crumbly but still hold its shape. Press into disk.

Wrap dough in plastic wrap and refrigerate for 30 minutes to 1 hour.

When ready to use, remove from refrigerator, unwrap, cut in half and roll out on floured surface. Keep the other half wrapped in frig until ready to use.

Pâte Sucrée (sweet dough)

This is a great dough for tarts or freeform galettes. This dough will stand on its own without the support of a pie pan and it is sweeter in flavor.

Recipe for Single Crust

  • 1 1/2 cup flour
  • 1/2 cup butter, unsalted
  • 1/2 teaspoon salt
  • 1/4 cup sugar
  • 1 egg yolk, beaten
  • 2-4 tablespoons very cold water

Cut the butter into very thin slices and place in freezer for 30 minutes. Meanwhile, mix flour and salt in large bowl. Place bowl in freezer for 15 minutes.

Add butter to flour and toss. Using fingers work the butter into the flour with a rubbing action. Continue until dough resembles a course crumble – in this dough you do not want to see small flakes of butter in the flour. If the flour/butter begins to warm, return bowl to freezer.

Add sugar and mix.

Add beaten egg and 2 tablespoons of water. Dump dough onto unfloured surface. If dough does not begin to hold its shape, add more water, 1 tablespoon at a time.

Knead the dough in long smooth strokes three or four times. Form the dough into a ball. Press down forming a disk. (This dough is much smoother than the Pâte Brisée.)

Wrap ball in plastic wrap and refrigerate for 30 minutes to 1 hour.

When ready to use, remove from refrigerator. Unwrap. Using minimal flour on rolling pen, roll out dough on top of the plastic wrap.

 Posted by at 8:04 am
Jul 262012
 
watermelon pickles

Watermelon Rind Pickles

I don’t remember my Grandmother Hazel canning, but most of what I remember was after her five sons had moved out and she was living alone. Corey’s great-grandmother however, canned everything! As she had either forgotten that all her children had left the nest or found it hopeless to convince PawPaw White not to plant their larger garden.

This is another one of Corey’s grandmothers, Nanny Bea. She was the cafeteria manager at the local high school for over thirty years. And in her day, every bit of food that came out of the school cafeteria was homemade with the freshest ingredients from hot cross buns to green beans seasoned with pork to cinnamon scented baked apples. And she lived her preference for real food at home with a garden the size of our entire backyard. Then again, she lived in a time when all food was real food.

This is Nanny Bea’s recipe for Watermelon Rind Pickles, an absolute I-will-not-share favorite of Corey’s.

Watermelon Rind Pickles

  • 1 large watermelon
  • 3 tablespoons salt
  • 6-8 sticks of cinnamon
  • 2 tablespoons whole cloves
  • 2 quarts white vinegar
  • 16 cups sugar

Slice watermelon into one inch sections and remove all of the pink fruit. Using a potato peeler remove the green peel from rind so that you are left with only the white section of the rind. Cut rind into one inch squares.

Add to a large pan and cover with water. Add salt and bring to a boil. Simmer until rind is tender.

Drain. Chill rinds in very cold water preferably overnight but for at least two hours. Drain water. Set aside.

In another large pan, add vinegar and sugar. Bring to a boil. Once boiling add cinnamon sticks, cloves tied in cheesecloth, and the drained watermelon. Simmer at a low boil until rind is clear and transparent.

Remove spice bag and cinnamon sticks. Pack the rinds into hot sterilized jars. Cover with the boiling hot syrup and seal immediately. Makes 6-8 pints.

Note: Depending on the size of the watermelon you may need more or less of the vinegar/sugar mixture.  This is fine. Just be sure to keep to a 2:1 ratio of two parts sugar to one part vinegar.

These pickles do not need to be processed in a water bath. Using hot jars and boiling hot syrup is sufficient to cause the jars to seal. After jars cool, test seals by pressing the center of each lid. If lid does not pop up and down it is sealed. If any lids do not seal properly within 24 hours, refrigerate and eat promptly.

 Posted by at 1:00 pm
Jul 232012
 

Just a few weeks ago I told you Caprese Salad was my all time favorite summer side for just about any meat on the grill. Well give a women a surplus and one might be surprised with what she comes up with.

Corey has been after me to make Watermelon Rind Pickles. So off to the local farmers market I went and after a short discussion with the farmer’s wife, I chose a beautiful, oblong, seeded melon. Seeded? I *know*, with all those wonderful seedless varieties now. Turns out the seeded watermelon has a wonderfully thick white layer of rind, which is what I was after.

So now I was left with finding something to do with the rest of the melon. Or at least what was left after the kids and I got our fill. Then one night we had Summer Corn Chowder and hamburgers on the grill. Looking for something cool to balance the meal, I came up with this super easy Watermelon Salad.


Watermelon Salad

  • Watermelon, 1 inch cubes
  • Feta Cheese, crumbled
  • Basil, chiffonade
  • Balsamic vinegar

Cut watermelon into one inch cubes and add to medium size bowl.

Sprinkle with a good amount of feta cheese and basil, enough to get some in every bite.

Then drizzle with a small amount of balsamic vinegar. Toss and serve.

Note: The first time I made this salad, I simply sprinkled the salad with a little salt (pictured above). And although it was good, it was missing something. The second time through I chose an aged balsamic vinegar instead, which really jazzed it up. Definitely go with the balsamic vinegar!

 Posted by at 12:07 pm
Jul 122012
 

I love this time of year and the ample supply of fresh food off the farm. It begins when asparagus first peaks out of the warming soil and strawberries are begging to be harvested and then continues through dirt grown tomatoes, juicy ripe peaches, and the smells of autumn ushering in the apple harvest.

Until I break down and finally plant our own small fruit orchard, I am blessed to be spoiled by Emily at Black Rock Orchard. This past Sunday the boys brought home a bushel of gorgeous peaches from the Dupont Circle Farmers Market. So Jordan and I cleared our schedule and spent the day canning peach halves and peach jam. We even had enough to freeze a little peach sorbet.

In my experience, late season cling free peaches make the pretties jars of canned peach halves (and it never fails those gems always ripen to perfection the week of our county fair!).

Whenever I work with a batch of peaches, I always start out making canned peach halves and am ready to adjust to peach jam if I find it difficult to pit the peaches. As I did today.

Canned Peach Halves

Add water to canner, cover, bring to boil. Keep water simmering. Heat jars and lids in hot, not boiling, water until ready to use. (I wash my jars in the dishwasher, timing it so it hits the dry cycle when I am ready for jars. Then I simply dip lids into hot, almost boiling, water I keep simmering on the stove to sterilize.)

In a separate pan, mix together 2 cups of sugar with 4 cups of water to make light syrup. Bring to a low boil and keep warm. Make more as necessary.

Wash and peel fruit. Dip peaches into boiling water and then cold water for easier peeling. Halve and pit peaches. Prepare enough to pack and fill one jar at a time. Add 1 teaspoon of Fruit Fresh per quart.

Cover fruit with syrup leaving 1/2 inch of head room. Clean rim using a clean, damp cloth to remove any syrup. Place lid on jar and apply band. Adjust until fingertip tight. Repeat with remaining fruit.

Add prepared jars of peaches to water bath and process pints for 20 minutes, quarts for 25 minutes. Make sure water covers top of jars by at least 1-2 inches. Remove from water bath and set on counter to cool.

After cooling, test seals by pressing the center of each lid. If lid does not pop up and down it is sealed. If any lids do not seal properly within 24 hours, refrigerate and eat promptly.

Peach Jam

  • 4 cups peaches, chopped
  • 1/3 cup lemon juice
  • 7 1/2 cups sugar
  • 1 pouch liquid pectin

Add water to canner, cover, bring to boil. Keep water simmering.

Heat jars and lids in hot water until ready to use.

Dip peaches into boiling water and then cold water for easier peeling.  Combine 4 cups of chopped peaches (about 9 regular size peaches), lemon juice, and sugar in heavy bottom pan. Mix well. Bring mixture to a full rolling boil (one that cannot be stirred down) over medium heat, stirring frequently.

Add liquid pectin. Continue hard boil for 1 minute. Remove from heat. Skim foam if necessary.
Ladle hot jam into hot jars, leaving ½ inch head room. Clean rim using a clean, damp cloth to remove any jam. Place lids on jars and apply bands. Adjust until fingertip tight.

Add prepared jars of jam to water bath and process for 10 minutes. Make sure water covers top of jars by at least 1-2 inches. Remove from water bath and set on counter to cool.

After cooling, test seals by pressing the center of each lid. If lid does not pop up and down it is sealed. If any lids do not seal properly within 24 hours, refrigerate and eat promptly.

Peach Sorbet

  • 4 lbs of peaches (roughly 15-16 regular size peaches)
  • 3 cups simple syrup (see below)
  • Juice from two lemons

Dip peaches into boiling water and then cold water for easier peeling. Pit peaches and rough chop. Puree peaches in a food processor or blender. Stir in simple syrup and lemon juice. Taste and adjust to your preference. Freeze in ice cream maker as instructed by manufacturer.

Simple Syrup: 2 cups water + 2 cups sugar. Bring to boil. Let syrup cool before using. Leftover syrup can be stored in glass jar.

Enjoy!

Related Posts Plugin for WordPress, Blogger...

 Posted by at 11:58 am